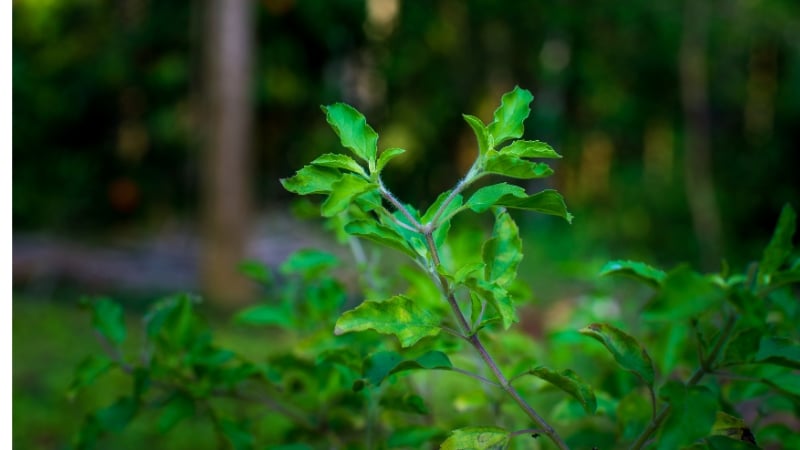
A Tulsi plant drawing is a representation of the holy basil plant depicted through artistic means. This drawing showcases the unique features of the Tulsi plant, such as its green leaves, purple flowers, and medicinal properties, providing a visual representation of this revered plant in Hindu culture.
Read More:
The Tulsi plant holds immense religious significance and is believed to be a manifestation of the goddess Lakshmi. Apart from its religious significance, Tulsi also possesses many health benefits and is commonly used in Ayurvedic medicine. By drawing a Tulsi plant, one can capture its essence and beauty, creating an artistic expression that pays homage to this sacred plant.
Step 1: Gathering The Necessary Materials
In the first step of drawing a Tulsi plant, gather all the necessary materials for the task. Prepare your paper, pencils, erasers, and any other art supplies you may need.
Before you start drawing a beautiful Tulsi plant, it is essential to gather all the necessary materials. Here’s what you will need:

- Pencil: A good quality pencil is important for creating accurate and detailed drawings.
- Eraser: Having an eraser handy allows you to make corrections and adjustments as needed during the drawing process.
- Drawing paper: Choose a smooth and sturdy paper that can handle pencil sketches without smudging or tearing.
- Reference image of a Tulsi plant: Find a clear and high-resolution image of a Tulsi plant to use as a visual guide. Having a reference image will help you understand the form, structure, and details of the plant while drawing.
By having all these materials ready, you can commence your Tulsi plant drawing with confidence and visual accuracy. So, let’s move on to the next step and dive into the exciting world of drawing!
Step 2: Observing The Structure Of A Tulsi Plant
In Step 2 of observing the structure of a tulsi plant, you can draw a visual representation of its various parts, such as leaves, stems, and flowers. Explore the intricate details of the plant and capture its essence through your artwork.
Before we dive into the fascinating process of drawing a tulsi plant, it’s crucial to first understand the plant’s structure. By observing its leaves, stems, branches, overall shape, and size, we can gain a deeper appreciation for this remarkable plant.

So, let’s take a closer look at the various elements that make up a tulsi plant.
Analyzing The Leaves:
When examining a tulsi plant, its leaves are one of the most prominent features. Take note of the following:
- Shape: Tulsi leaves typically resemble an oval with a pointed tip.
- Texture: The leaves are smooth and have a glossy surface, giving them a distinct shine.
- Arrangement: Tulsi leaves are arranged in pairs, opposite to each other on the stem.
- Veins: You’ll notice a network of veins running through the leaves, which serve as conduits for nutrients and water.
Examining The Stem And Branches:
The stem and branches of a tulsi plant provide support and transportation for vital substances. Here are some key details to observe:
- Stem Texture: The stem of a tulsi plant is sturdy yet slightly fuzzy, covered in tiny hairs.
- Color: The stem is usually green but can develop a reddish tinge in some varieties.
- Branching Pattern: Tulsi plants have a branching structure, with multiple branches extending from the main stem.
Understanding The Overall Shape And Size:
Observe the overall size and shape of the tulsi plant to capture its essence in your drawing. Consider the following:
- Height: Depending on the variety, a tulsi plant can range from 1 to 3 feet in height.
- Shape: Tulsi plants often have a compact bushy shape, with branches extending in various directions.
- Growth Habit: Some cultivars may exhibit a more upright growth habit, while others appear more spreading and trailing.
Now that you have familiarized yourself with the various components that comprise a tulsi plant, you are ready to move on to the next step in your drawing journey. Let’s explore the fine details of the leaves and their unique characteristics in the upcoming section.

Step 3: Sketching The Basic Outline
Sketching the basic outline is an essential step in creating a realistic and detailed drawing of a Tulsi plant. By carefully outlining the main features and proportions, you can bring the beauty of this sacred plant to life.
Starting with the stem and branches:
- Begin by drawing a straight line to represent the main stem of the tulsi plant. Make it slightly curved to give a more organic look.
- From the stem, draw several branches extending upwards and outwards. Vary the thickness and length of the branches to add visual interest.
Adding the main leaves:
- Tulsi leaves are oval-shaped with serrated edges. Start by drawing the largest leaf at the top of the main stem.
- Continue drawing smaller leaves on each branch, alternating sides as you go. Ensure that the leaves overlap the branches slightly to create a natural look.
Outlining the overall shape of the plant:
- Once you have sketched the stem and leaves, it’s time to outline the overall shape of the tulsi plant.
- Connect the branches with gentle curves, mimicking the shape of an umbrella. This will help define the rounded form of the plant.
- Ensure that the branches and leaves are evenly spaced to create a balanced composition.
By following these steps, you can easily sketch a basic outline of the tulsi plant. The key is to start with the stem and branches, add the main leaves, and then outline the overall shape. Remember to maintain a natural and organic look throughout the drawing.

Step 4: Adding Details To The Leaves And Stem
In Step 4 of drawing a Tulsi plant, you can add intricate details to the leaves and stems to bring your artwork to life.
Now that you have a basic outline of your tulsi plant drawing, it’s time to add some intricate details to make it look more realistic and vibrant. In this step, we will focus on creating texture on the leaves, adding veins, and enhancing the texture and dimension of the stem.
Let’s get started!
Creating Texture On The Leaves:
- Begin by lightly sketching short, curved lines along the edges of the leaves to represent the leaf’s serrated edges.
- Use a stippling technique to create a textured effect on the leaves. This can be achieved by creating a series of small dots close together, gradually darkening as you move towards the center of the leaf. This technique adds depth and dimension to the leaves.
- Vary the size and spacing of the dots to create a more organic and natural-looking texture.
Adding Veins To The Leaves:
- Draw a central vein running down the center of each leaf. This vein should be thicker and more prominent than the other veins.
- From the central vein, draw smaller veins branching out towards the edges of the leaf. These veins should be thinner and gradually fade away as they reach the leaf’s serrated edges.
- To create a more realistic look, add smaller secondary veins branching off from the main veins. These secondary veins should be shorter and lighter.
Enhancing The Texture And Dimension Of The Stem:
- Start by darkening the outer edges of the stem using shading techniques. This adds depth and gives the stem a three-dimensional appearance.
- Use short, curved lines to create texture on the stem. These lines should follow the shape of the stem and can overlap slightly.
- To add more dimension, lightly shade one side of the stem, creating a subtle shadow effect. This highlights the roundness and contours of the stem.
- Add small bumps and irregularities along the stem to make it appear more natural. Remember, not every part of the stem will be perfectly smooth.
By focusing on these details, you can bring your tulsi plant drawing to life. Take your time, pay attention to the shape, texture, and dimensions, and remember to have fun throughout the process. Happy drawing!

Step 5: Adding Shadows And Highlights
In the fifth step of drawing a Tulsi plant, we enhance the artwork by adding shadows and highlights, bringing depth and dimension to the illustration. This technique adds realism and visual interest to the final piece.
To bring your tulsi plant drawing to life, it’s important to add shadows and highlights. This will create depth and a realistic touch to your artwork. Follow these steps to achieve an impressive result:
Identifying The Light Source
- Determine where the light is coming from in your drawing. This will help you understand where shadows and highlights should be placed.
- Make sure to maintain consistency with the light source throughout your drawing.
Adding Shadows To Create Depth
- Start by identifying the areas of your tulsi plant drawing that would naturally have shadows. This includes the underside of leaves, behind stems, and any overlapping parts.
- Use a light pencil to lightly sketch the desired shadow areas.
- Gradually darken these areas, keeping in mind the intensity of the light and the depth you want to create.
- Remember to blend the shadows smoothly to avoid harsh lines. This can be done using a blending stump or cotton swab.
Adding Highlights For A Realistic Touch
- Determine the areas of your drawing that would catch the most light and appear brighter than others.
- Using a light pencil, lightly sketch these highlight areas.
- Gradually add more intensity to these areas, working with different shades of the color to create realistic highlights.
- Be mindful of the position and reflections of the light source when adding highlights.
By carefully incorporating shadows and highlights in your tulsi plant drawing, you can give it a three-dimensional appearance and make it more visually appealing. Take your time and observe real-life examples to make your shading and highlighting as accurate as possible.
Happy drawing!
Step 6: Finalizing And Refining The Drawing
In the final step of refining the drawing of a tulsi plant, attention to detail is crucial. Enhance the fine lines, add shading, and bring the artwork to life with intricate brushstrokes.

Adding Finer Details
- Now that you have the basic structure of the tulsi plant drawn, it’s time to add some finer details. This will bring your drawing to life and give it a realistic touch. Here are a few steps to help you add those delicate features:
- Sketch the intricate patterns on the tulsi leaves using light, short strokes. Pay attention to the veins and the irregular edges of each leaf. This will give your drawing a more realistic look.
- Use a darker pencil or fine-tip pen to define the shapes of the leaves. Add some depth by shading one side of each leaf, creating a slight shadow effect.
- Don’t forget to draw the tiny hairs on the stems and leaves of the tulsi plant. These hair-like structures can be drawn using short, light strokes or dots, depending on your preference.
- Next, draw the delicate flowers of the tulsi plant. Start by sketching the shapes of the petals, making sure they are proportional and symmetrical. You can add more definition by drawing the stamens at the center of each flower.
- Lastly, add any other details that you feel will enhance your drawing. This could include small insects on the leaves, water droplets, or even a pot or planter for the tulsi plant.
Smoothing Out Any Rough Lines
- After completing the initial sketch of the tulsi plant, it’s important to go back and refine your lines. This will give your drawing a more polished and professional appearance. Here’s how you can smooth out any rough lines:
- Take a step back and assess your drawing as a whole. Identify any areas where the lines appear jagged or uneven.
- Carefully retrace those lines using a softer pencil or a fine-tip pen. Try to make your lines as smooth and continuous as possible.
- Use light, confident strokes to redraw any problematic areas. Take your time and keep your hand relaxed to achieve smoother lines.
- Remember, it’s okay to make mistakes. If you’re not satisfied with how a line looks, don’t hesitate to erase it and try again.

Erasing Unnecessary Guidelines
- As you progress with your tulsi plant drawing, you may find that there are guidelines or construction lines that are no longer needed. Here’s how you can clean up your drawing by erasing unnecessary guidelines:
- Take a close look at your drawing and identify any guidelines that are still visible. These are usually faint lines used to help with proportions or angles.
- Using a soft eraser, gently remove these guidelines. Be careful not to erase any essential lines or details that you want to keep.
- If any erased areas appear smudged or dirty, use a clean eraser or a small piece of kneaded eraser to lift off any leftover graphite or ink.
- Remember, the goal is to create a clean and polished final drawing, so take your time and be patient while erasing the unnecessary guidelines.
By following these steps, you’ll be able to add finer details, smooth out any rough lines, and erase unnecessary guidelines, resulting in a beautiful and realistic tulsi plant drawing. Take your time, enjoy the process, and don’t be afraid to add your own artistic flair to make the drawing uniquely yours.
Ending point
Tulsi plant drawing is an enjoyable and creative activity that allows us to connect with nature and express our artistic abilities. Drawing tulsi plants can be a therapeutic experience, helping to reduce stress and promote relaxation. It is also a great way to learn more about the unique features and characteristics of this sacred plant.
By observing and capturing the intricate details of the tulsi plant, we can deepen our understanding and appreciation for its medicinal and spiritual significance. Whether you are a beginner or an experienced artist, drawing tulsi plants provides an opportunity for personal growth and self-expression.

Furthermore, sharing your tulsi plant drawings with others can inspire and educate them about the importance of this plant. You can use your artwork to raise awareness about its healing properties and encourage others to incorporate it into their daily lives.
So why wait? Grab your pencils and paper, and let your creativity flourish as you bring the beauty of the tulsi plant to life through your drawings.